Technical Breakdown: Remote Site Deployment
How to use the Uspace OctaNode collection node to regain system control after a "disappeared" contractor, bypass proprietary software locks, and configure MQTT data transmission in record time.
The Situation: Legacy of a "Disappeared" Contractor
Site: Two remote block-boxes containing critical infrastructure (UPS for a transformer substation, fire, and security alarm systems).
The Problem: The previous operating organization left behind "scorched earth." The Zabbix-based monitoring system is locked, and the Customer has no passwords. The Customer requires full control in the dispatch room over the UPS status (monitoring all network and battery parameters), fire loops, and environmental sensors.
"Cracking" the old system's passwords was deemed impractical due to time constraints and risks. The solution: a clean installation of the Uspace OctaNode collection node with data passthrough to the customer's dispatch center.
Technical Stack and Equipment
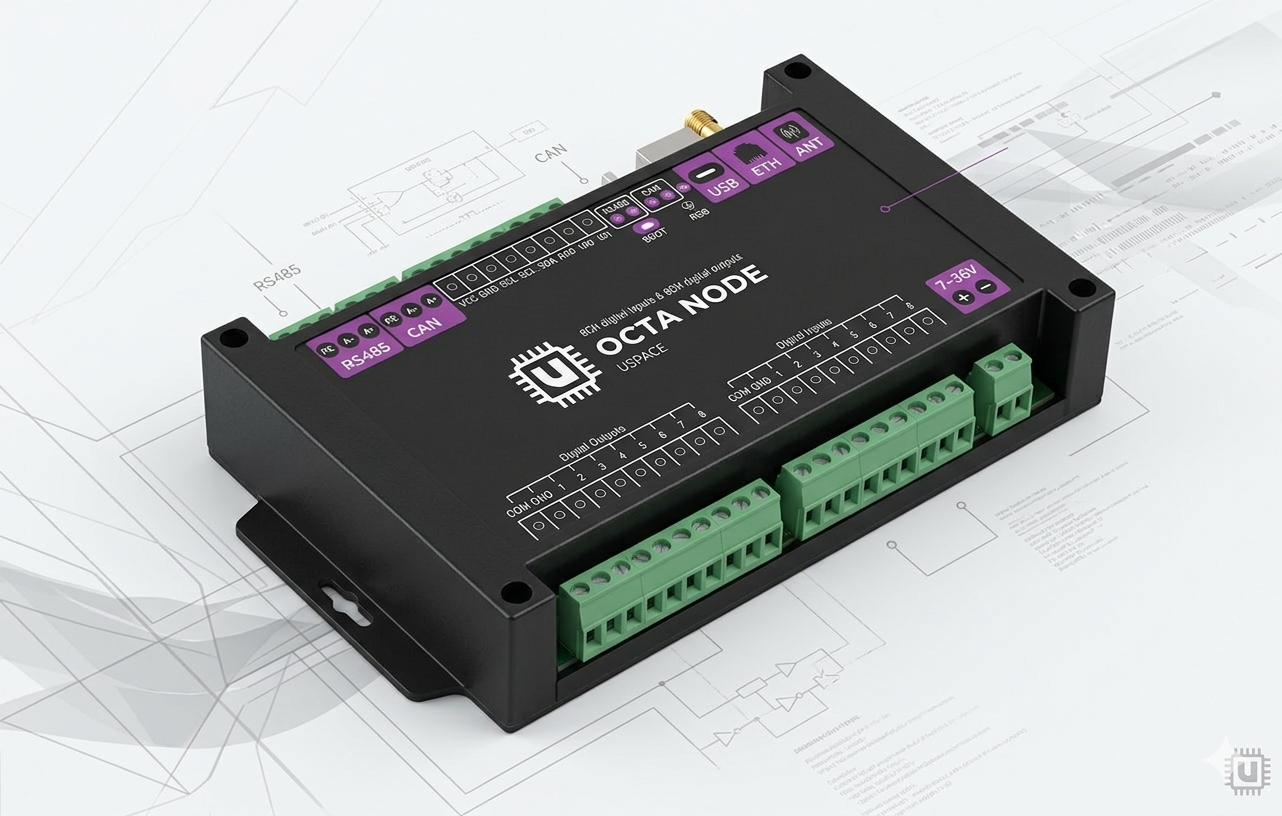
- Controller: Uspace OctaNode (Industrial gateway with Edge Computing support).
- Protocols: Modbus RTU (RS-485).
- UPS (Uninterruptible Power Supply) — over 80 registers (voltage, currents, battery capacity, inverter temperature, errors).
- I/O Modules (dry contacts for fire and security alarms).
- Microclimate Sensors (temperature, humidity).
Monitoring Objects:
Step 1: Physical Layer and Gateway Initialization
First things first—check the physics. RS-485 is a reliable protocol but sensitive to topology. The bus must be laid using twisted pair cabling. We connect the line to the OctaNode and verify the polarity (A/B). Devices with incorrect polarity simply won't respond to queries.
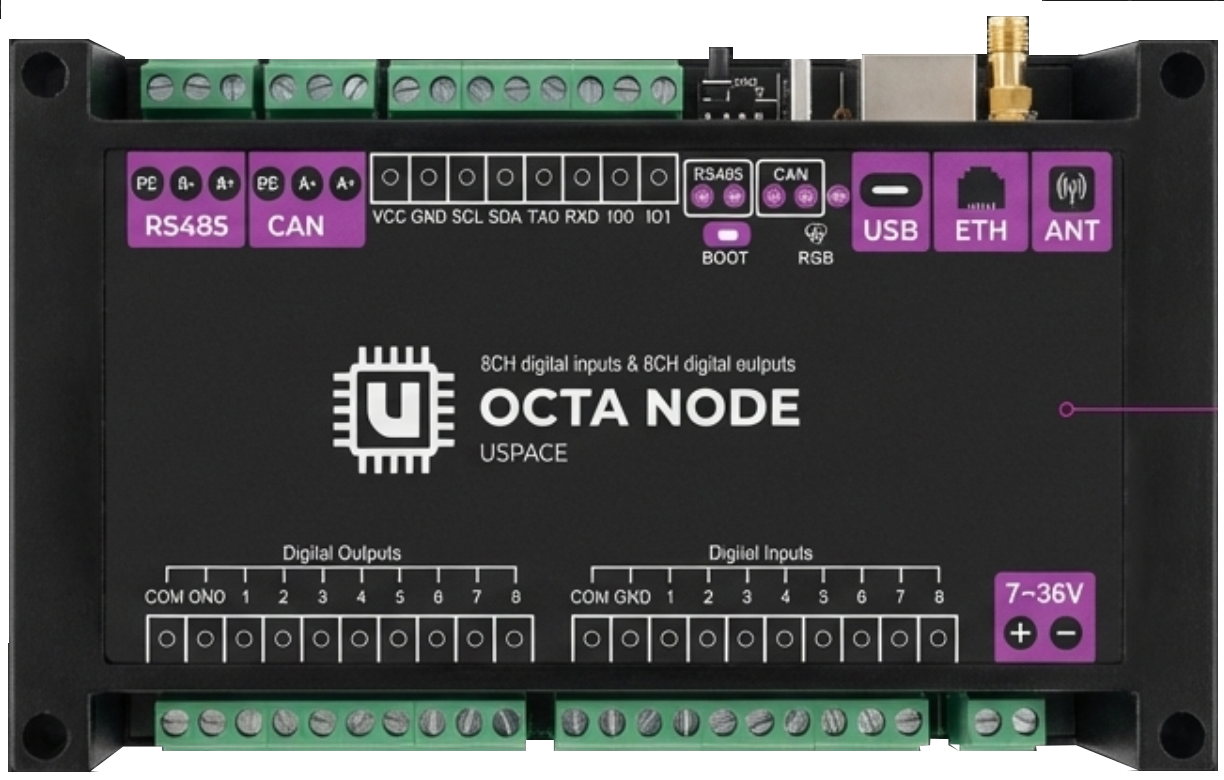
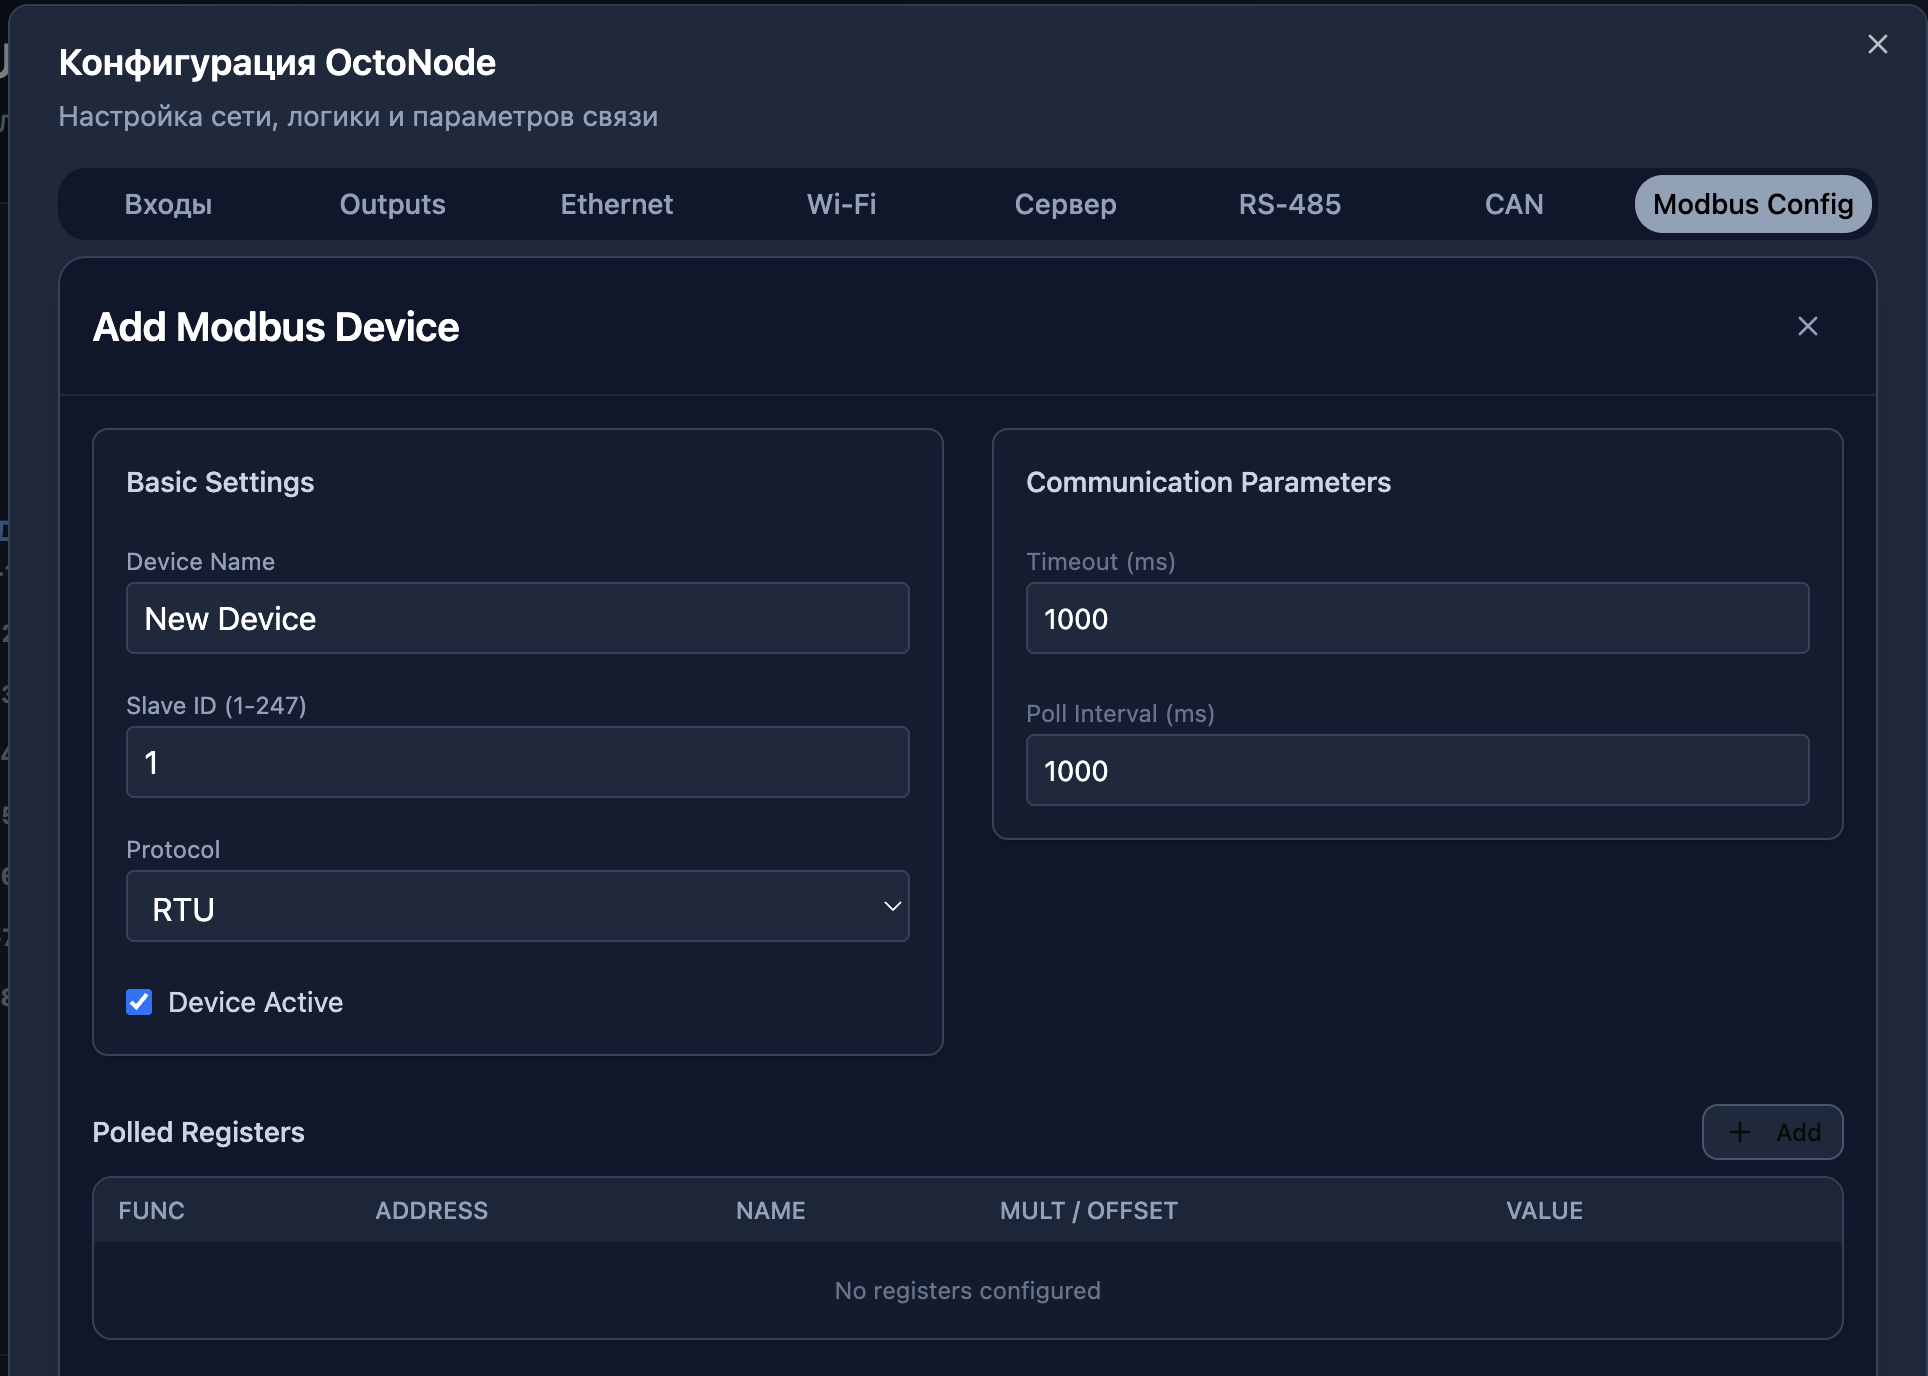
In the OctaNode interface, adding Modbus devices takes just a few clicks. To access the gateway, you can double-press the "boot" button, and the gateway will switch to Access Point mode. All settings are configured via a standard browser—Chrome, Firefox, or your preferred choice.
It’s very simple: connect to the "OctaNode" Wi-Fi, navigate to IP address 192.168.4.1, authorize, and proceed to configuration.
Modbus Device Configuration is performed in two steps:
- Baud Rate: 9600 (typical for UPS).
- Data Bits: 8.
- Parity: None.
- Stop Bits: 1.
1. Connection parameter setup. It is critical to set these according to the register map of the connected devices. In our case:
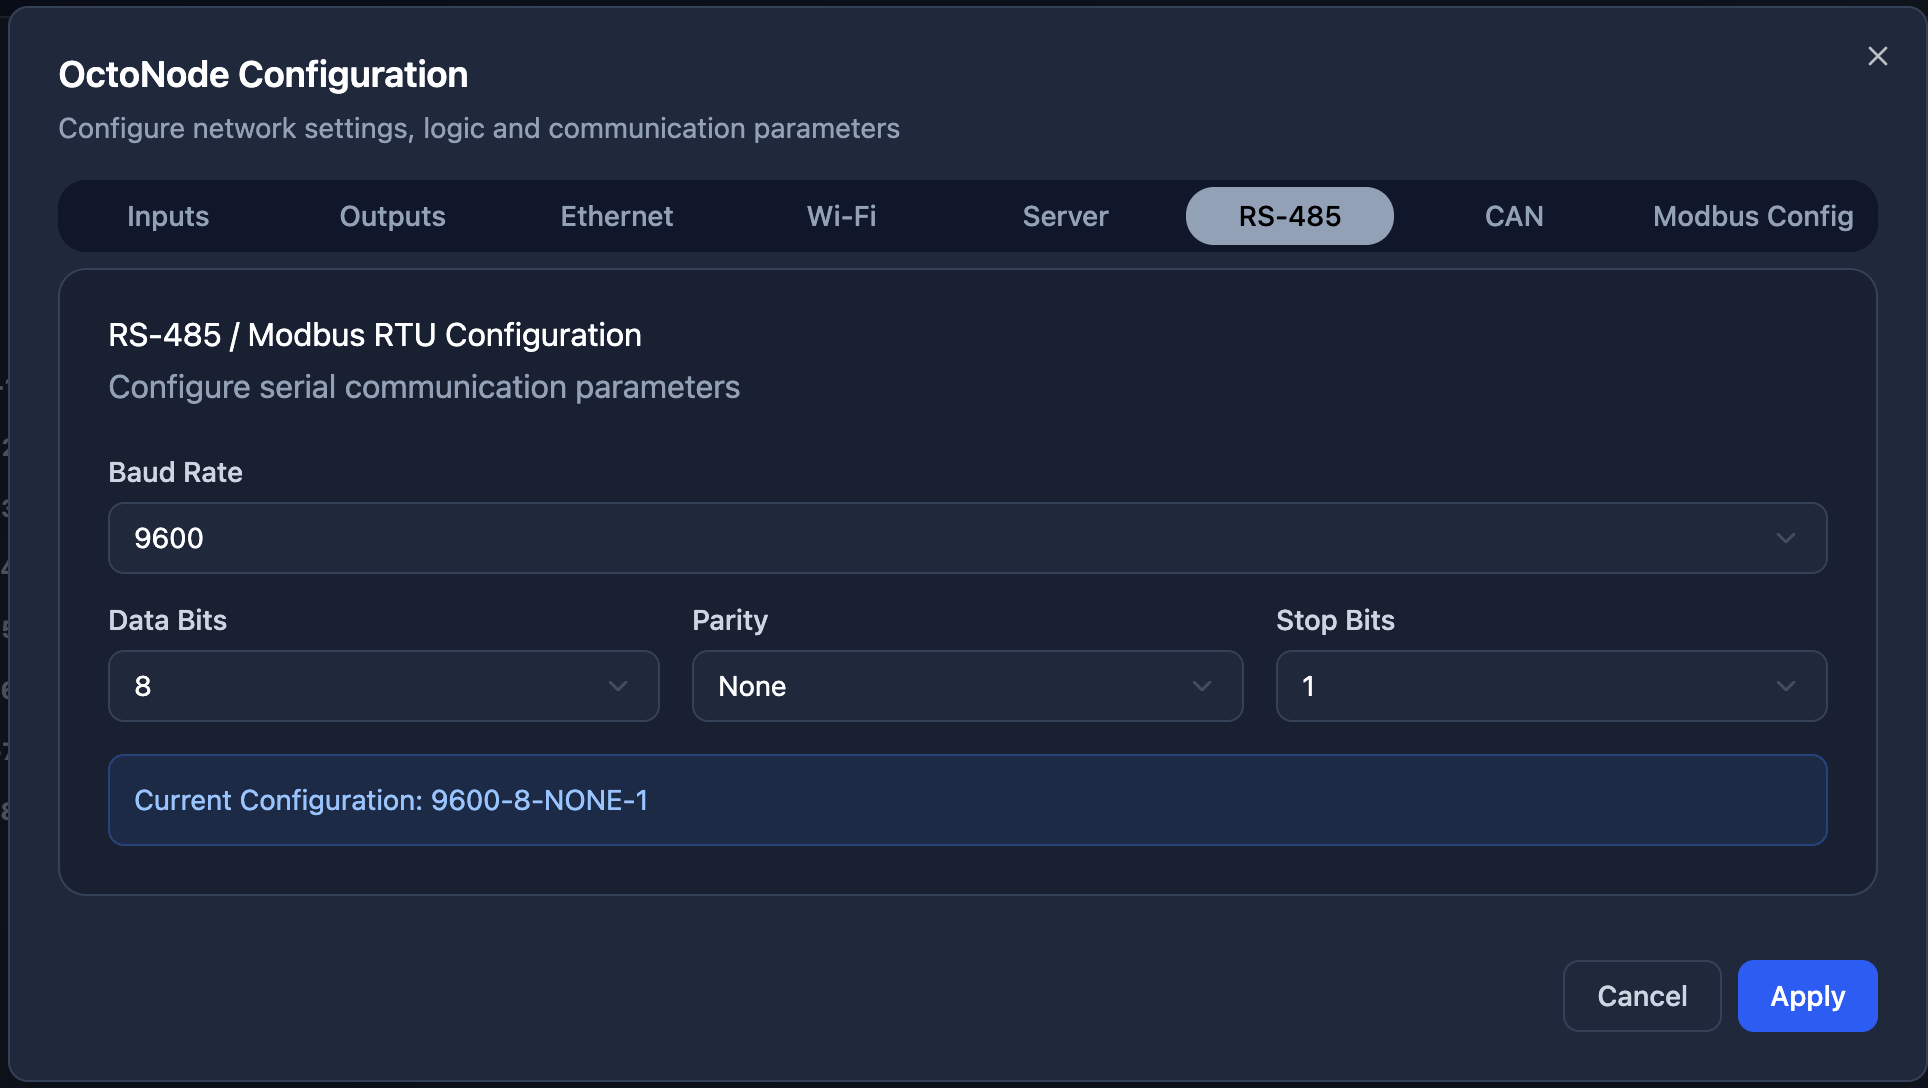
Important! These parameters must be identical for all devices on the same bus; otherwise, you risk high error rates or receiving no data at all due to collisions.
2. We define the Device Name and its Slave ID (in our case, the UPS was address 1), and that’s it. OctaNode allows polling up to 10 devices on a single bus.
Step 2: Register Mapping and Native Synchronization
The main pain point for an engineer working with Modbus is manual address entry. A single offset error and you get "garbage" instead of data.
Uspace features a visual mapping mechanism. we take the PDF file of our device's Modbus map and simply begin the transfer.
The process is broken down into logical steps:
- Parameter Name: User-friendly for the dispatcher (e.g., "Phase A Voltage").
- Function Code: Most manufacturers use Function 04 (Read Holding Registers).
- Register Address: Specify the address from the datasheet or map.
- Data Type: In Uspace, the choice of data type (16-bit Int, 32-bit Float, etc.) and byte order is handled automatically. You don't need to worry about the raw value format arriving in your data field.
- Native Integration: As soon as you save a parameter in the OctaNode configurator, it is automatically (natively) saved in the device's memory. From there, you can send this data to your SCADA system.
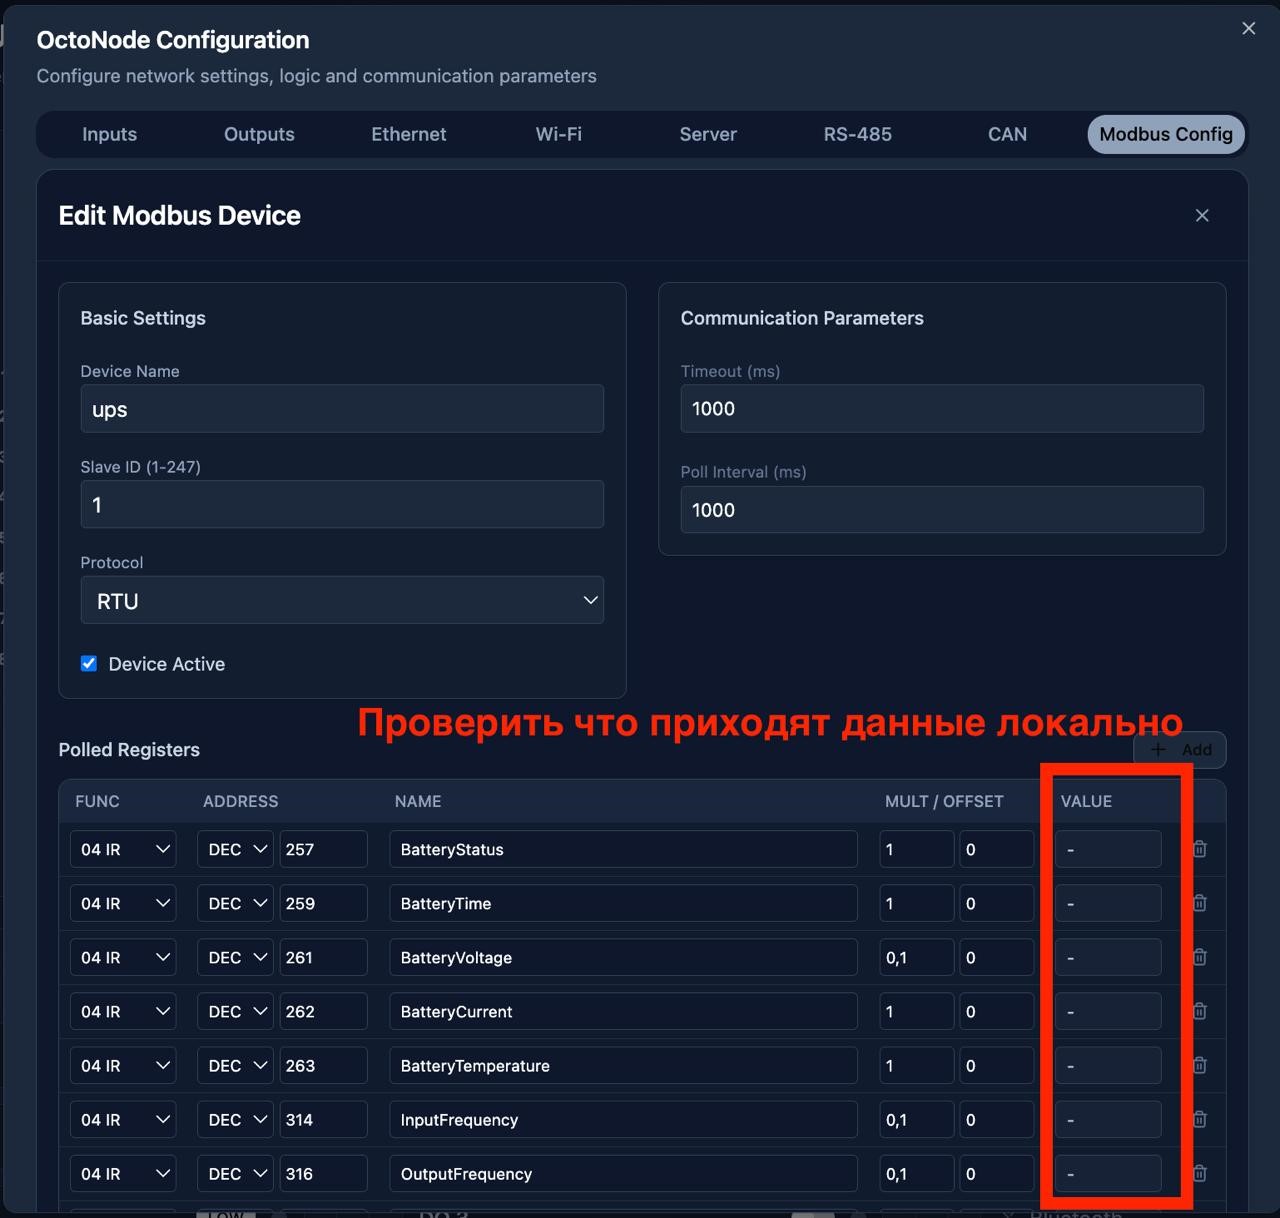
Important! When using the Uspace Cloud, you don't need to re-define tags in the SCADA system or database—the link between the hardware and the cloud is seamless.
Step 3: Cloning and Reproduction Across Other Sites
When you have a network of 50 block-boxes rather than just one, manual mapping even for 30 minutes becomes a burden—especially when sites are 10km apart.
OctaNode provides the ability to import and export configurations. Once we have "polished" the mapping at the first site, we save it as a template.
- Deployment: You can deploy this same register set to other OctaNodes installed at similar sites in just two clicks.
- Reproduction: An engineer at a new site doesn't need to know the Modbus map. They simply connect the OctaNode to the bus and apply the ready-made "UPS Type 1" profile. This eliminates "human error" when scaling the system.
Step 4: Edge Computing
The site is remote, and the connection is unstable. OctaNode can be configured as an autonomous computing node:
- Local Polling: Polling continues uninterrupted even if the cloud link drops.
- Buffering: If the connection breaks, data is written to internal memory (can be expanded separately).
- Synchronization: When the connection is restored, OctaNode "uploads" the archive, restoring the historical integrity of the charts.
- Automation: In critical situations, automated actions can be configured to prevent emergencies or equipment damage.
Step 5: Architectural Approaches to Visualization and Management
The choice of dispatching platform determines not only the interface but also the Total Cost of Ownership (OPEX) and control capabilities.
- Uspace Cloud (Native Cloud): Seamless "out of the box" integration. The main advantage is predictive analytics. The system analyzes historical data (e.g., battery capacity degradation rates at specific temperatures) and issues alerts before a failure occurs. 24/7 availability from anywhere without VPN setup.
- Proprietary SCADA Systems: Heavy solutions from monopoly vendors. They require purchasing licenses for tag counts, engineering dongles, and deep expertise in specific software. Any configuration change (adding one sensor) becomes a complex project requiring certified specialists.
- Open Source SCADA Systems: Require massive time investments for manual configuration edits, SQL queries, and connector maintenance. High barrier to entry: instead of monitoring, the engineer spends time maintaining the software itself.
- Monitoring Systems (Zabbix/Grafana): Effective for visualization but have a critical limitation—they operate in Read-only mode. You can see an alarm, but you have no native tools for feedback (writing to Modbus registers) for remote error resets or load management.
Technical Conclusions
- Speed and Scalability: Setting up the first node took 30 minutes. Setting up each subsequent identical node takes less than 2 minutes thanks to the configuration cloning feature.
- Unified Stack: The native link between OctaNode and the Uspace cloud removes the "connection setup between driver and visualization" phase. A parameter in the hardware = a parameter in the cloud.
- Fault Tolerance: Local data caching solves the problem of unstable communication channels at remote points.
- Security: Moving away from white IPs and VPNs in favor of outbound TLS connections from the OctaNode gateway.
- Openness: When the choice of architecture is an opportunity, not a privilege.
This case confirms: transitioning from unique, "hand-crafted" settings at every site to data unification is the path to effective management of distributed infrastructure.